
How to use project wizard
Creating a New Project
To begin creating a new project:
Select Projects from the main menu.
Click the Add New button to open the Project Wizard.
The Project Wizard walks you step by step through setting up the data structure for a renewables project or campaign. Projects can be created as simple drafts or fully detailed setups. We recommend completing as much information as possible early on to avoid duplicate work later.
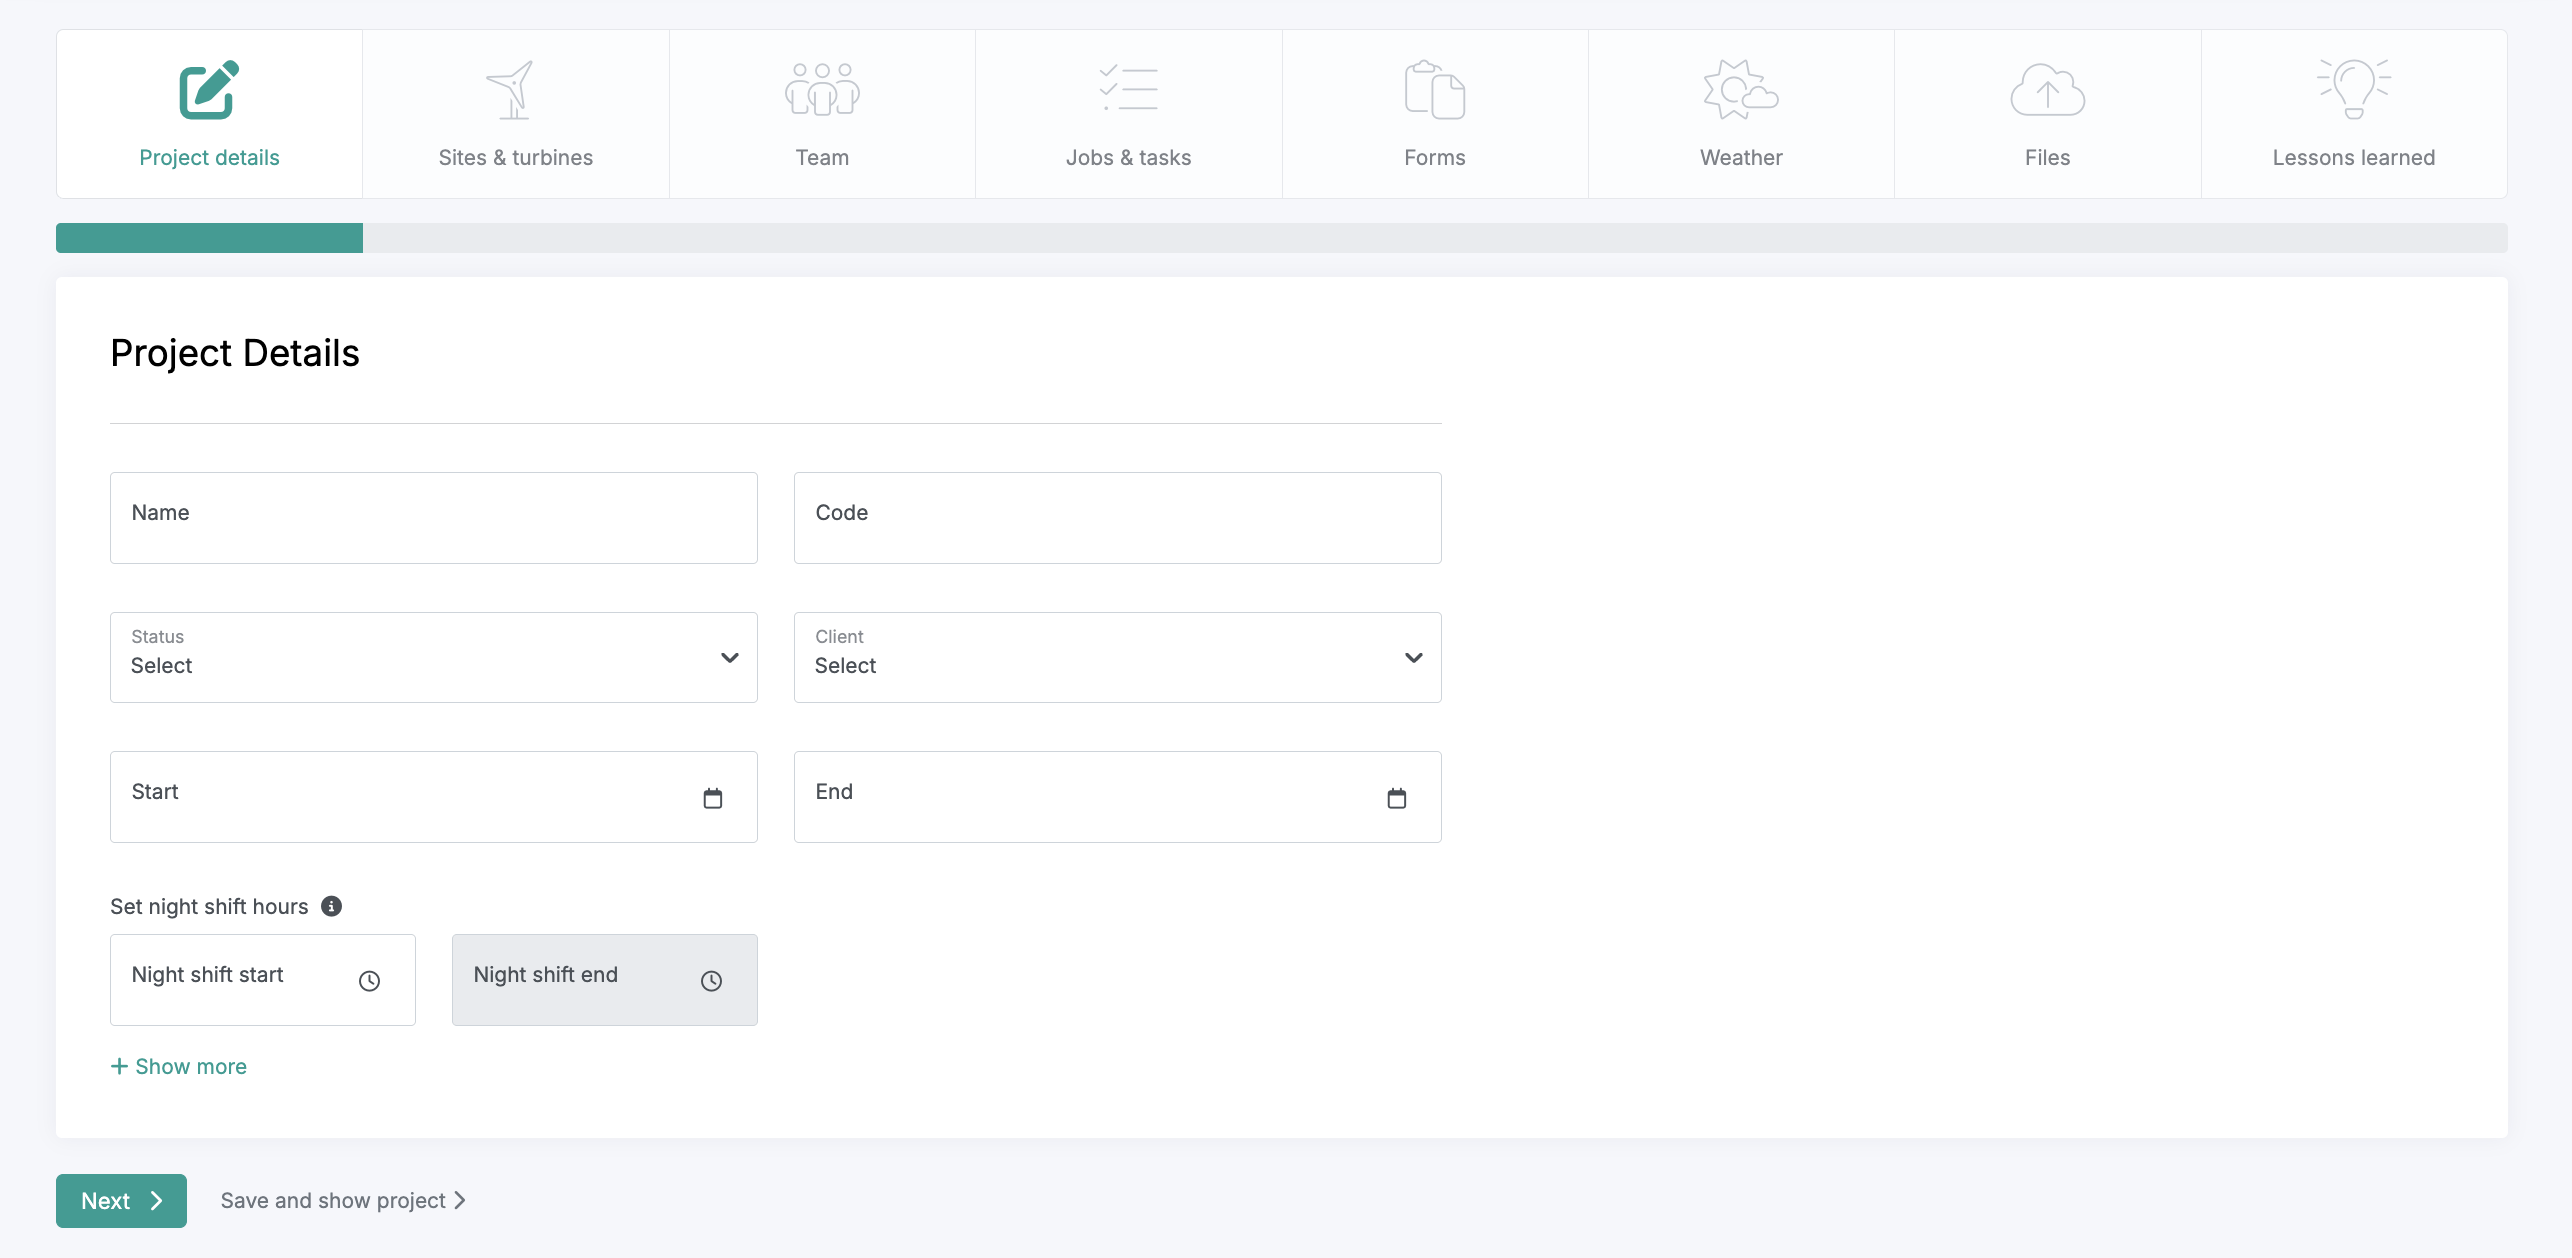
Filling Out the Project Details Screen
Follow these steps on the Project Details screen:
Add Basic Details: Enter the project name, project code or number, and current status.
Assign the Client: Select the project’s client. This automatically activates the client portal, which remains permission locked to external users until they are added to a workflow stage.
Set the Date Range: Define the estimated project duration. These dates serve as planning guidance but won’t restrict scheduling if the project extends or shortens later.
Set Night Shift Hours: Define the hours that count as night shifts. Any activities logged in timesheets between these times will automatically be categorized as night shift work.
Add Descriptions: Click + Show More to expand the description fields.
Public Description: Visible to technicians in the mobile app.
Internal Briefing, Reasons, Objectives, and Risks: Visible only to web users with the proper permissions.
Once all required fields are complete, click Next to proceed to the next setup screen.
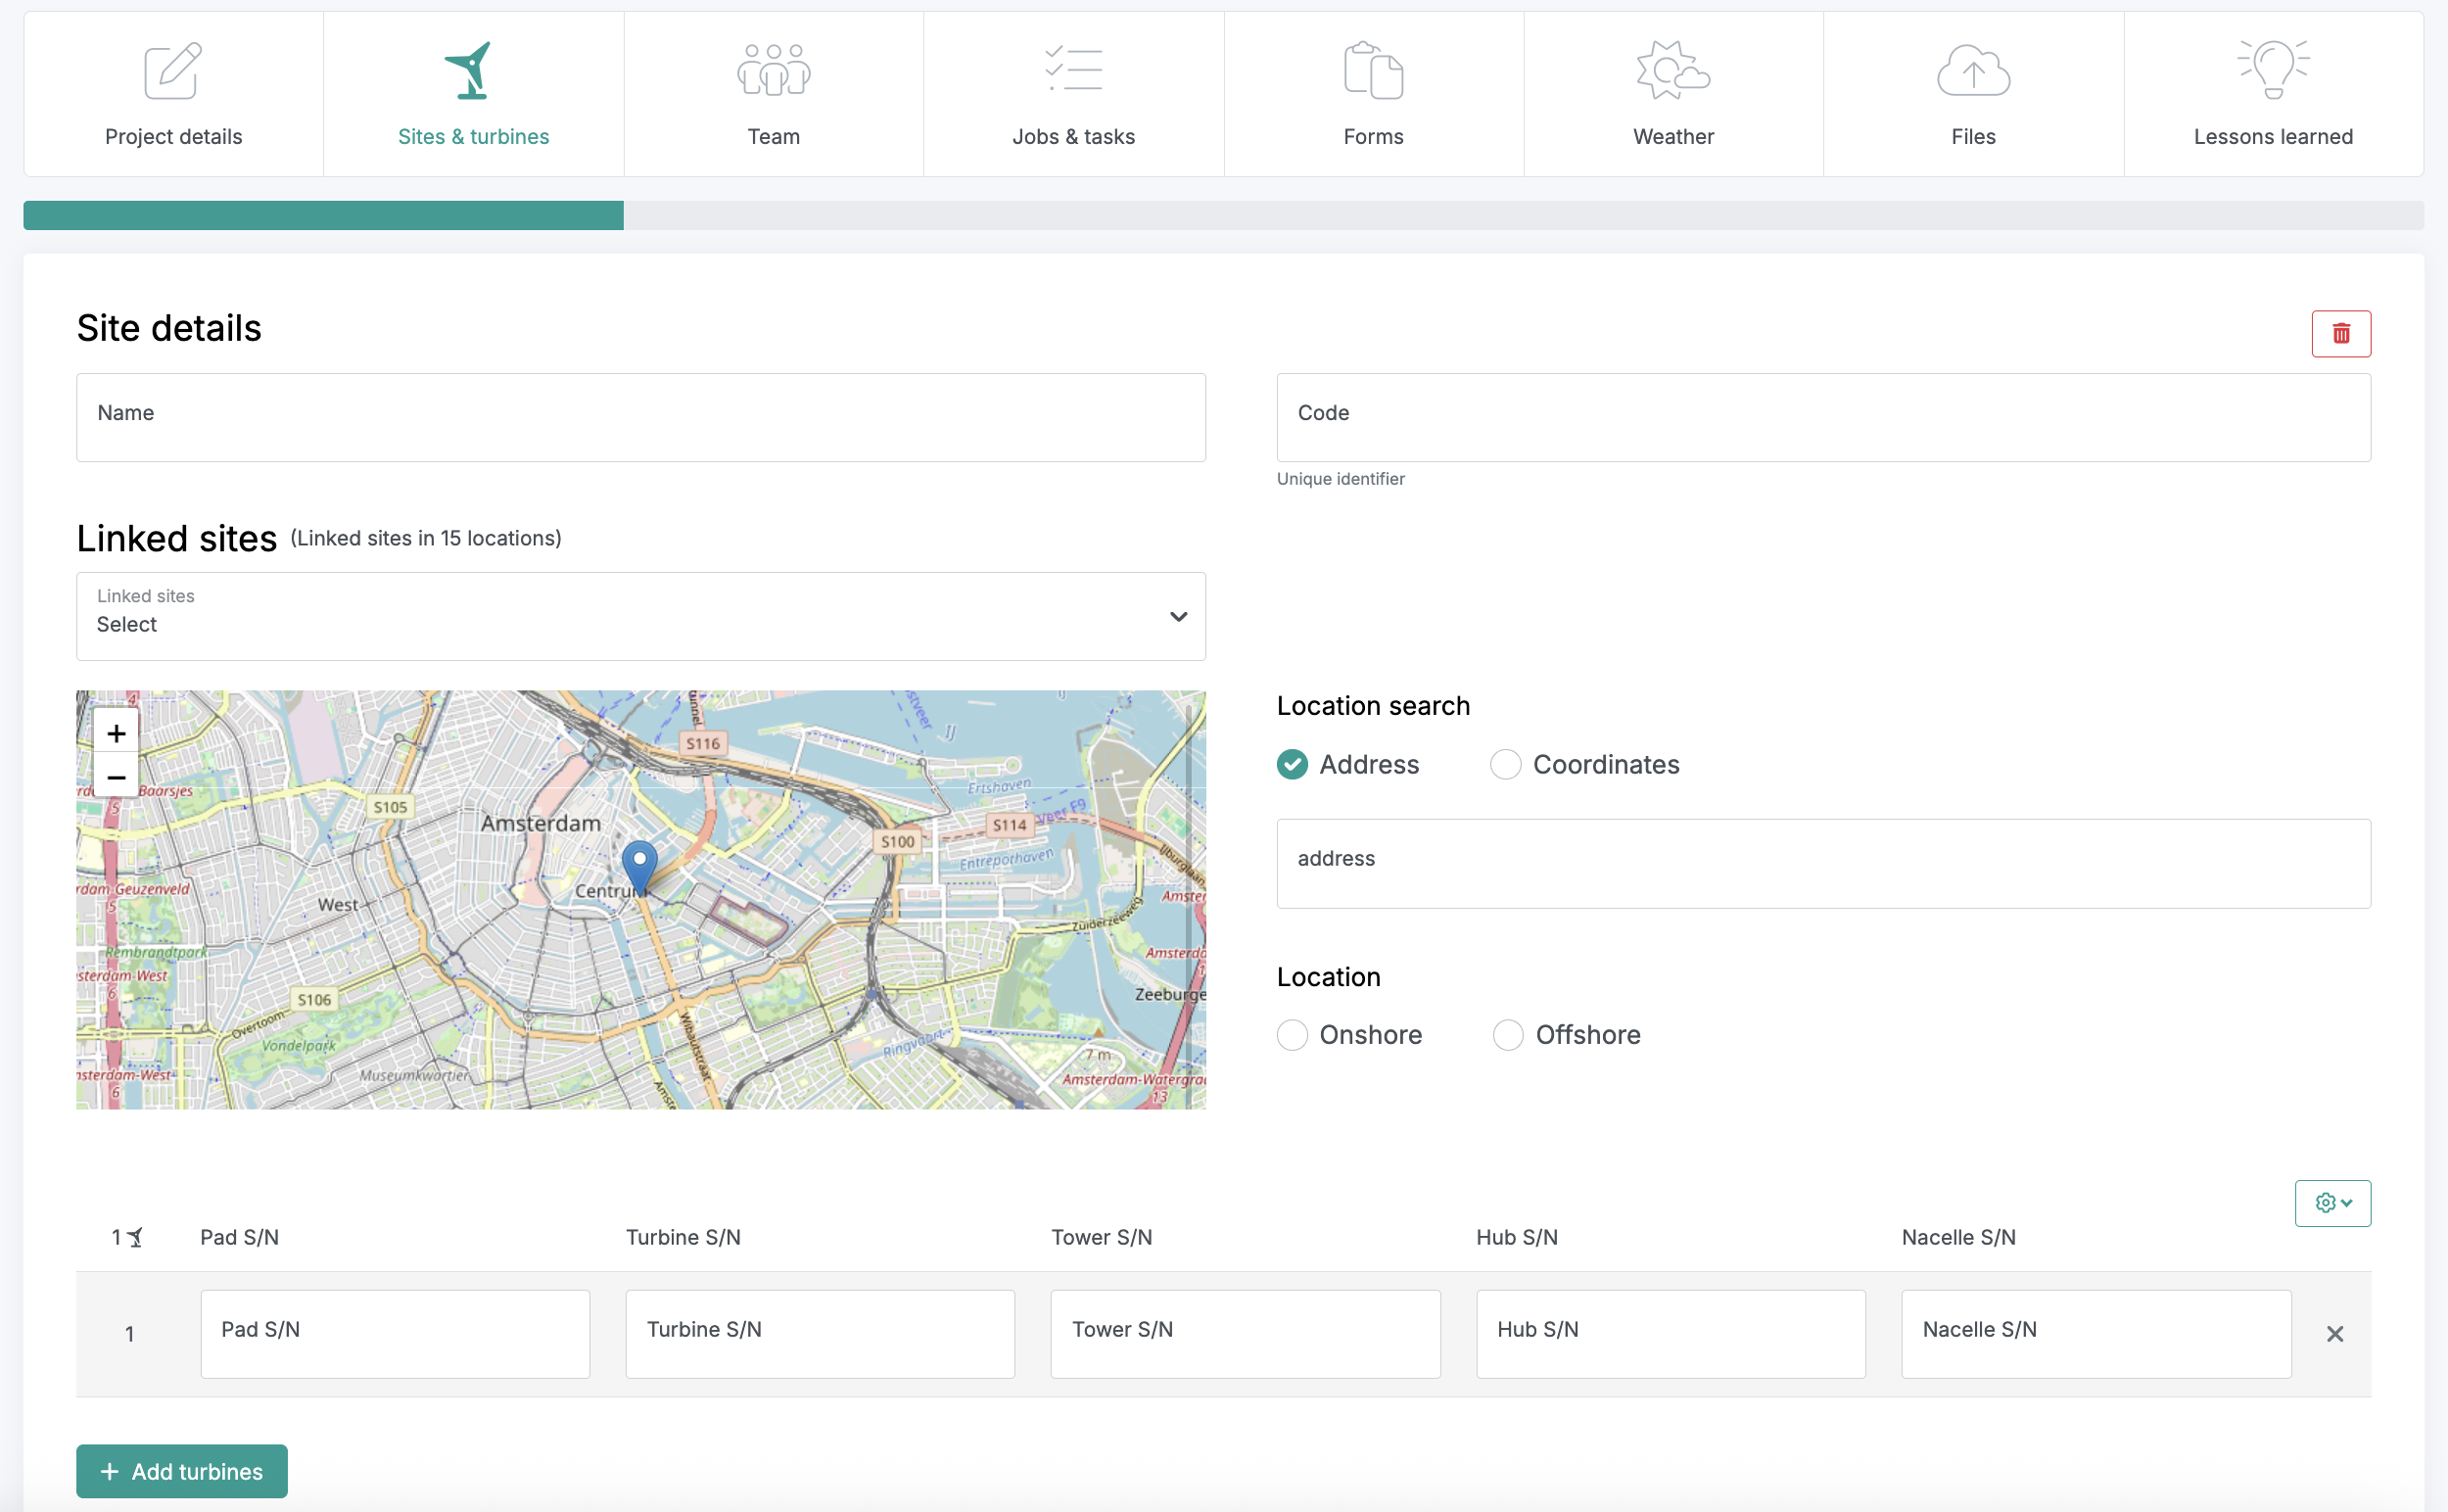
How to Fill in the Sites and Turbines Screen
The Sites and Turbines screen defines the project’s location structure used by both the Project Planning Board and Reporting automation features.
Follow these steps to complete the section:
Add Site Details: Enter the site name and site code or number.
Set Location: Use the location search bar to add an address, add coordinates, or drop a pin directly on the map by clicking the desired location.
Define Location Type: Specify whether the site is onshore or offshore.
Add Turbines:
Enter turbine pad numbers as a minimum.
Include serial numbers if available, and optionally add major component identifiers that technicians will use in reporting.
Bulk Upload Turbines:
A CSV Upload feature will be available in Q4 2025.
Until then, contact your Customer Success Manager for guidance on how to bulk upload turbine data from a spreadsheet.
When the section is complete, click Next to continue to the following setup screen.
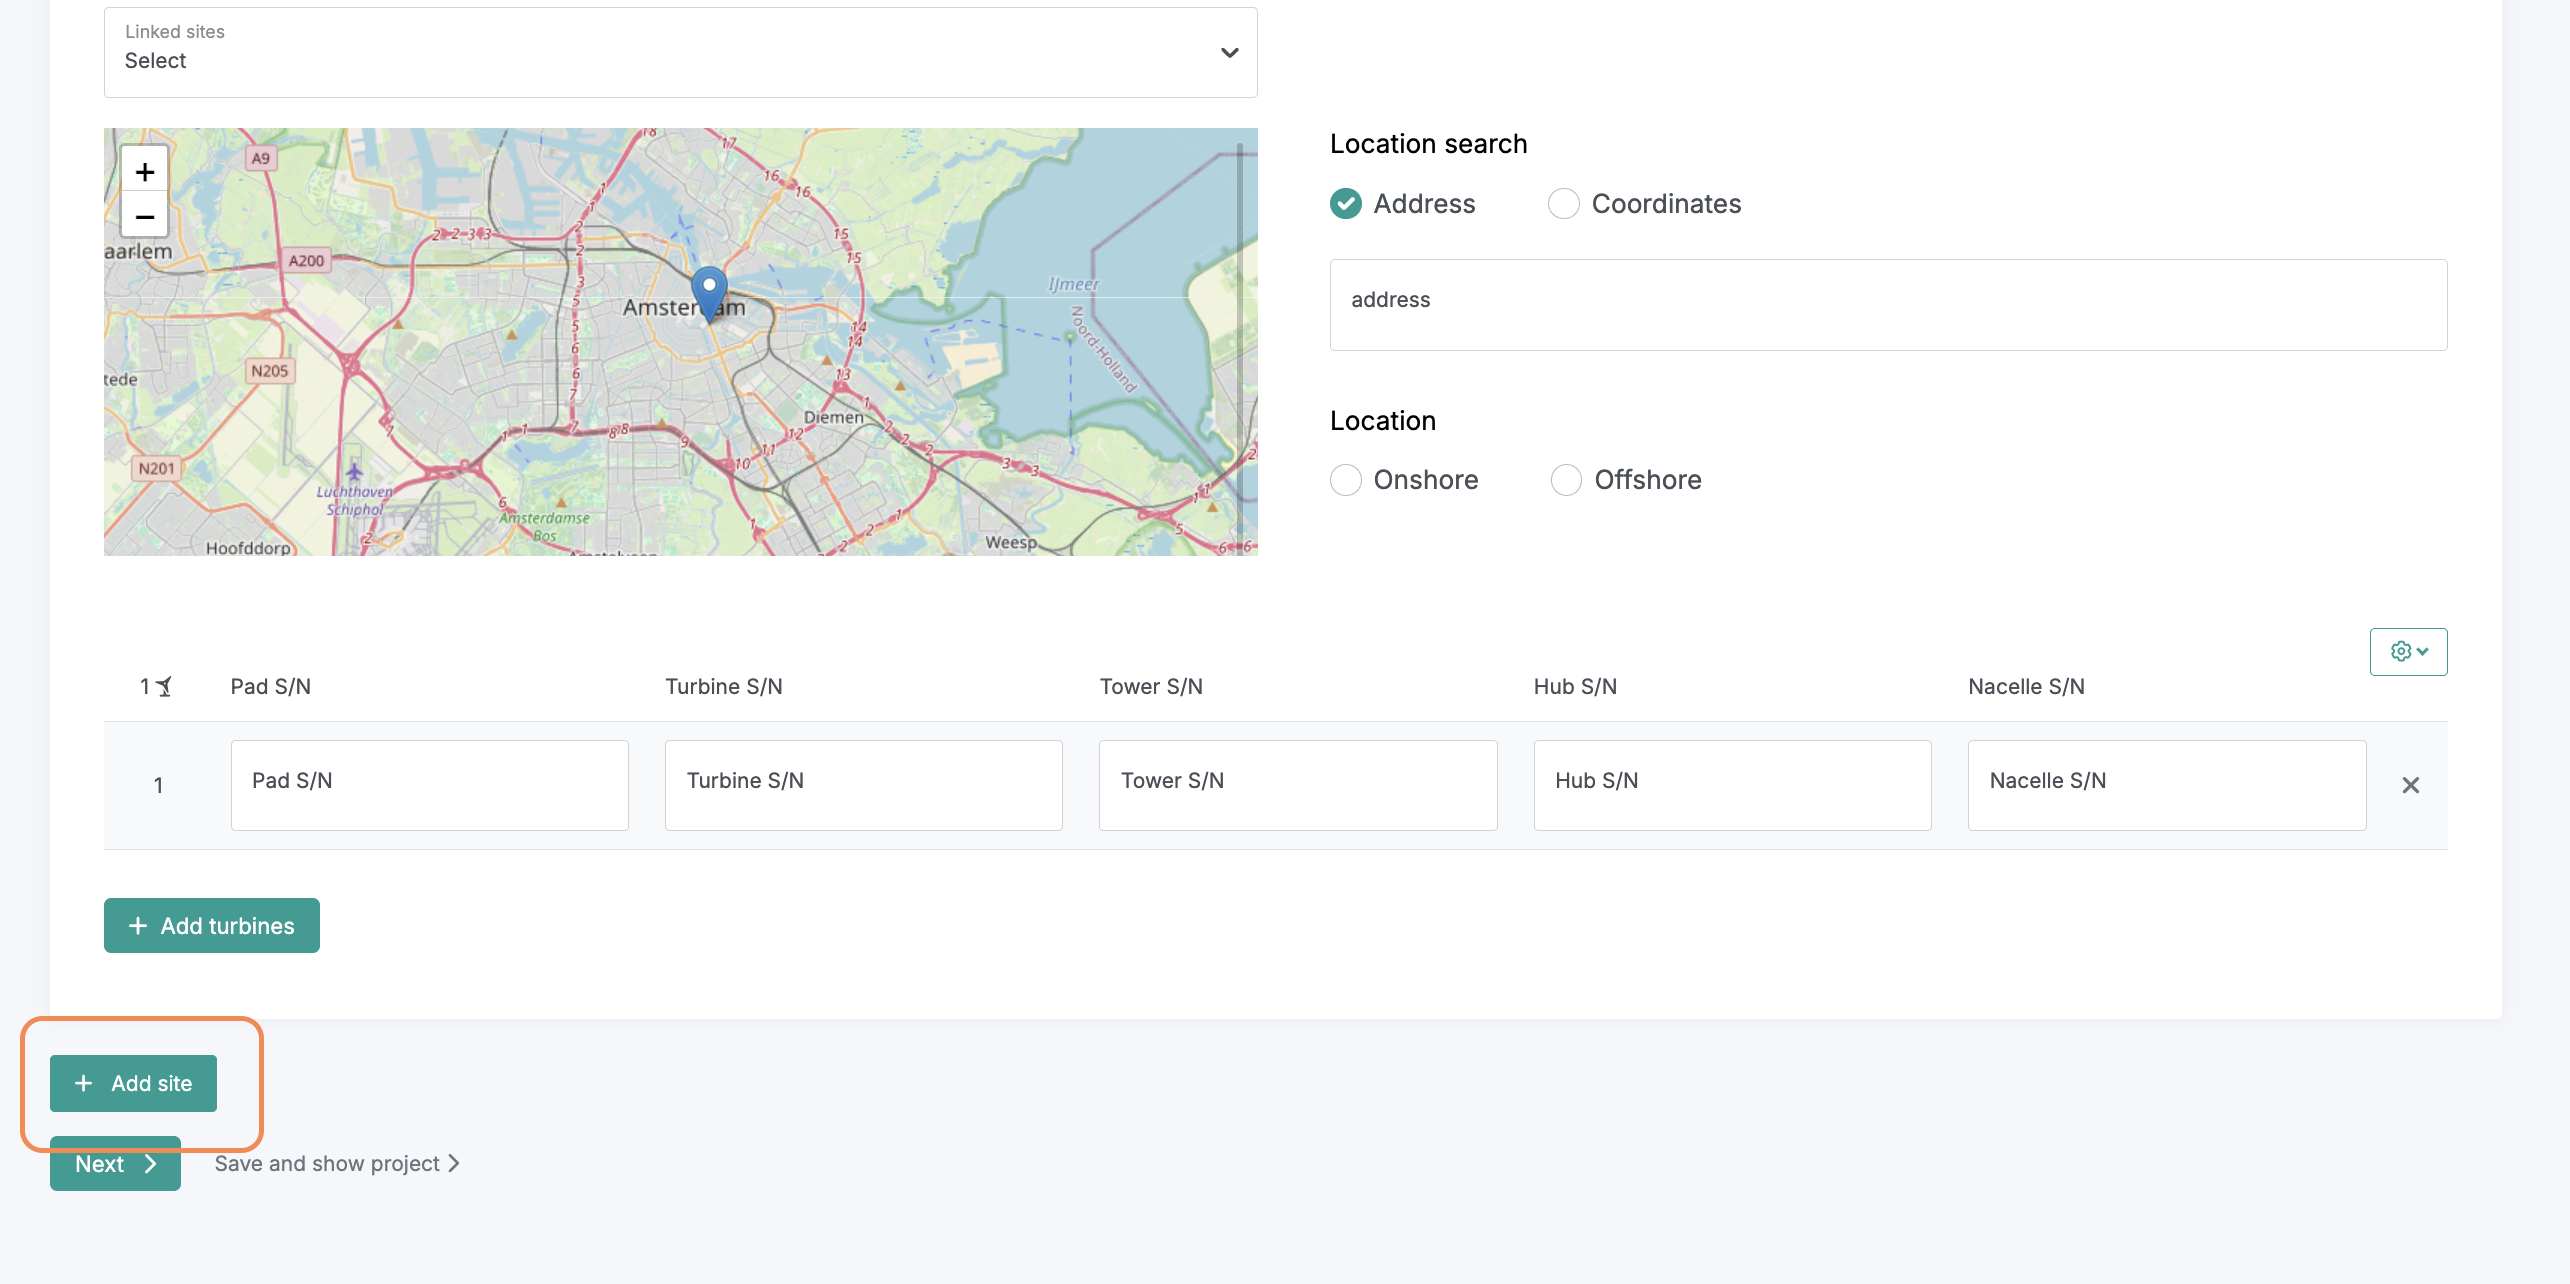
Adding Multiple Sites
Creating multi-site campaigns in Twindo is simple and flexible.
Click the Add Site button to create a new site entry.
Repeat the process as many times as needed, there’s no limit to the number of sites you can add to a single project.
When all sites have been added, click Next to proceed to the following section of the Project Wizard.
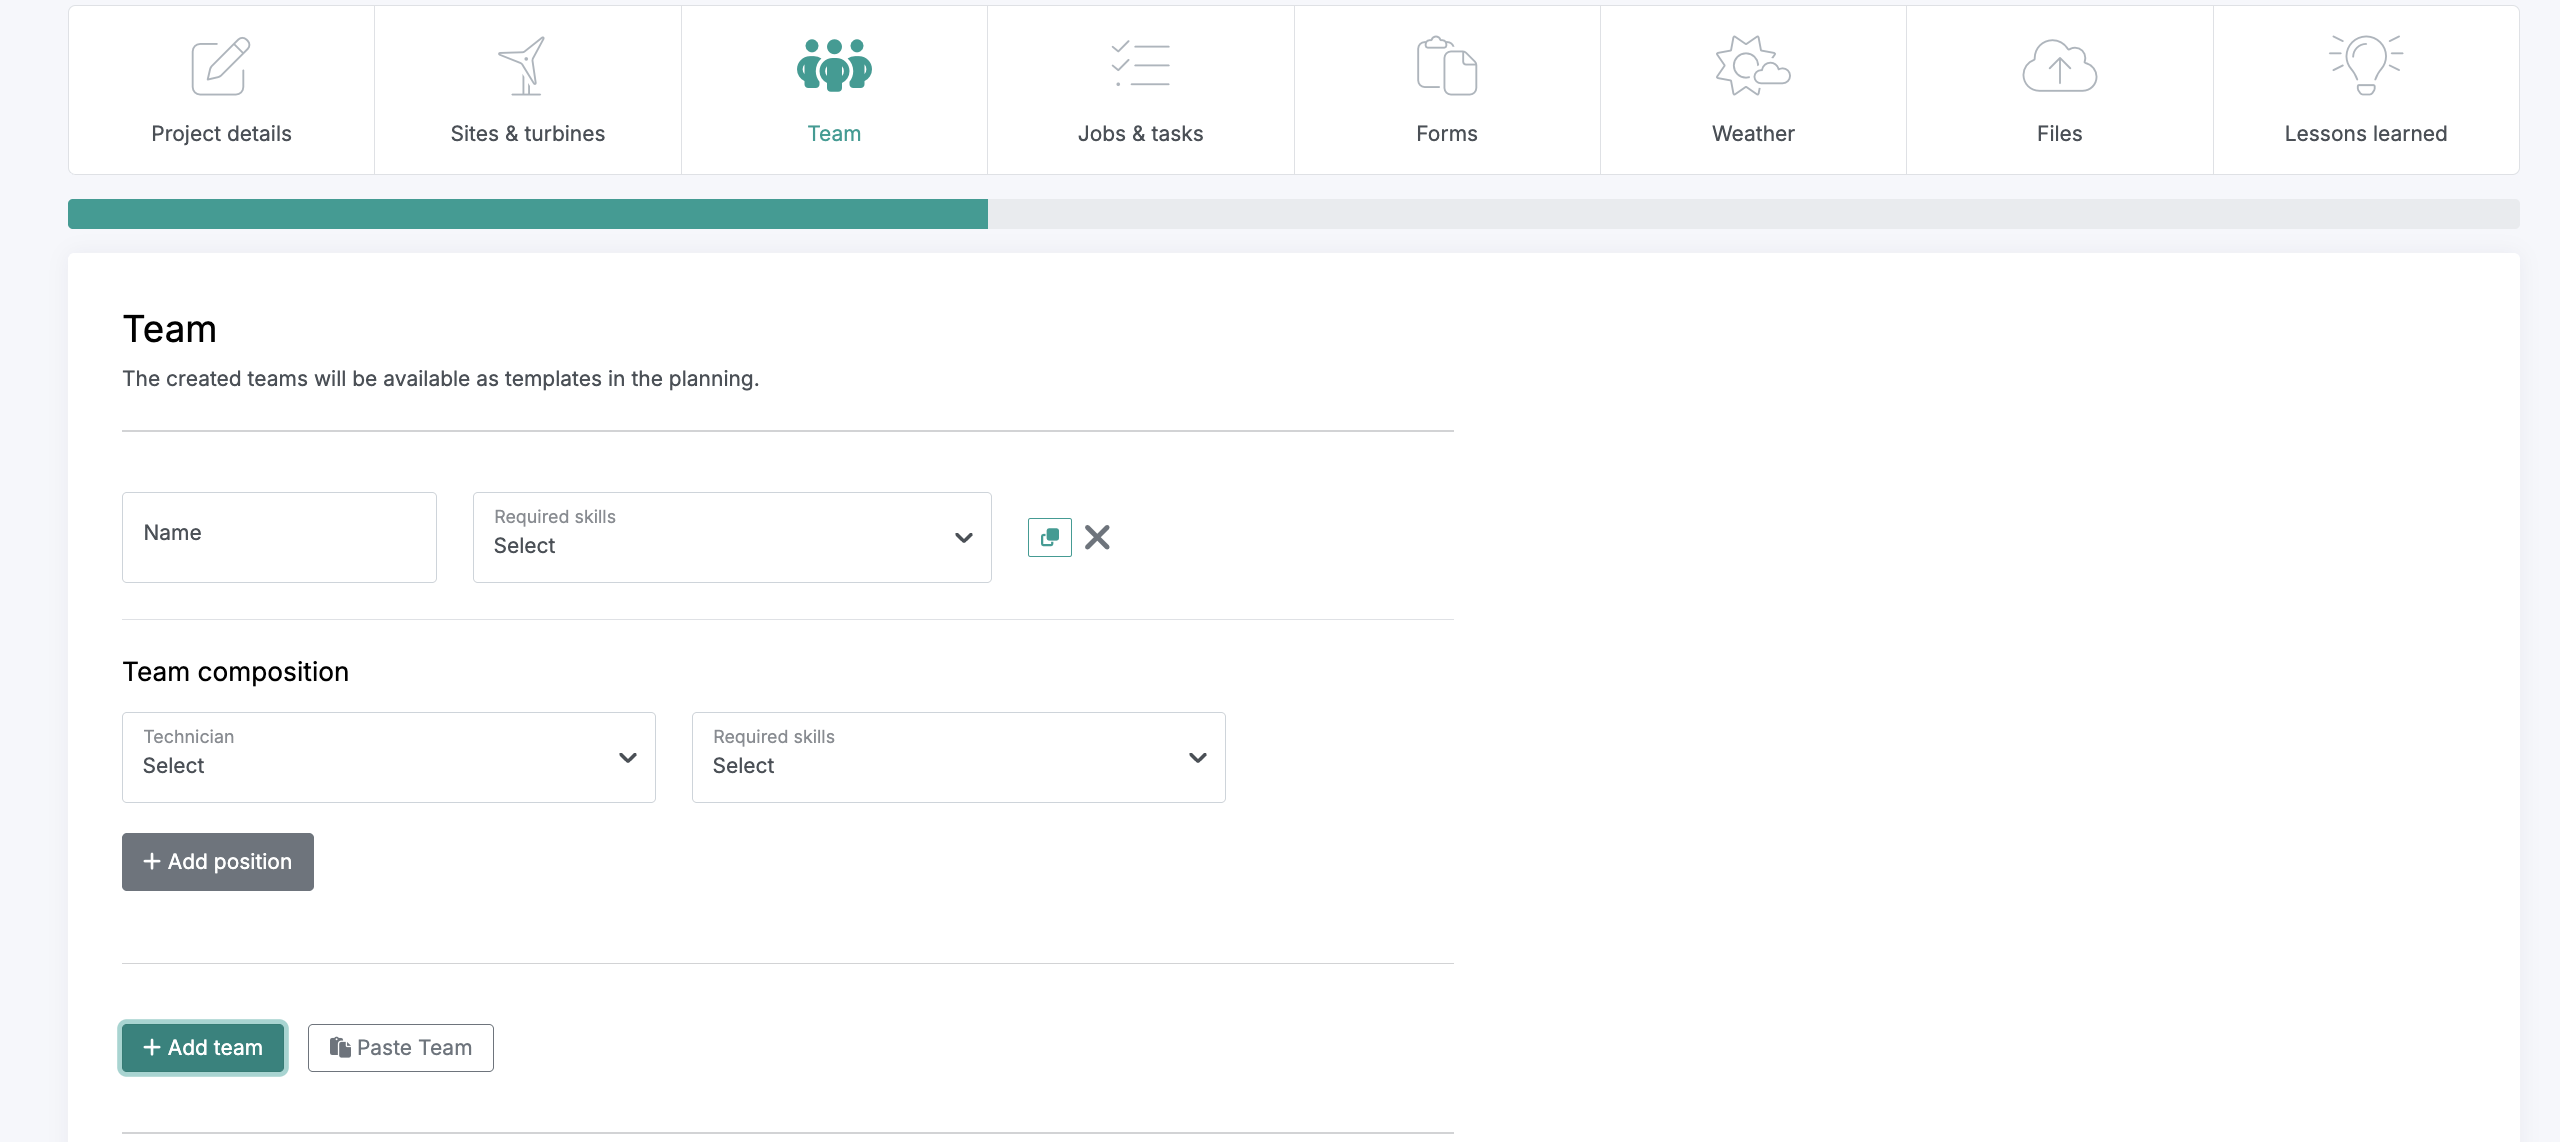
How to Fill in the Teams Screen
The Teams screen defines your project’s team structure, including required skills, training, and key leadership roles such as the client manager.
Follow these steps to complete the section:
Add Team Details: Enter a team name and specify the number of positions needed by selecting Add Position.
Note: Technician names are not added here, they’ll be assigned later during project planning.
Assign Required Skills:
Open the Required Skills dropdown to add relevant trainings or qualifications.
Setting required skills next to the team name applies those skills to all team members.
You can also assign position specific skills individually.
To manage or create new skills, visit the Skills menu tab, this is your central skills library.
Copy and Paste Teams:
You can duplicate a team structure within the same project or copy it to other projects to speed up setup.
Once your team configuration is complete, click Next to continue to the next stage of the Project Wizard.
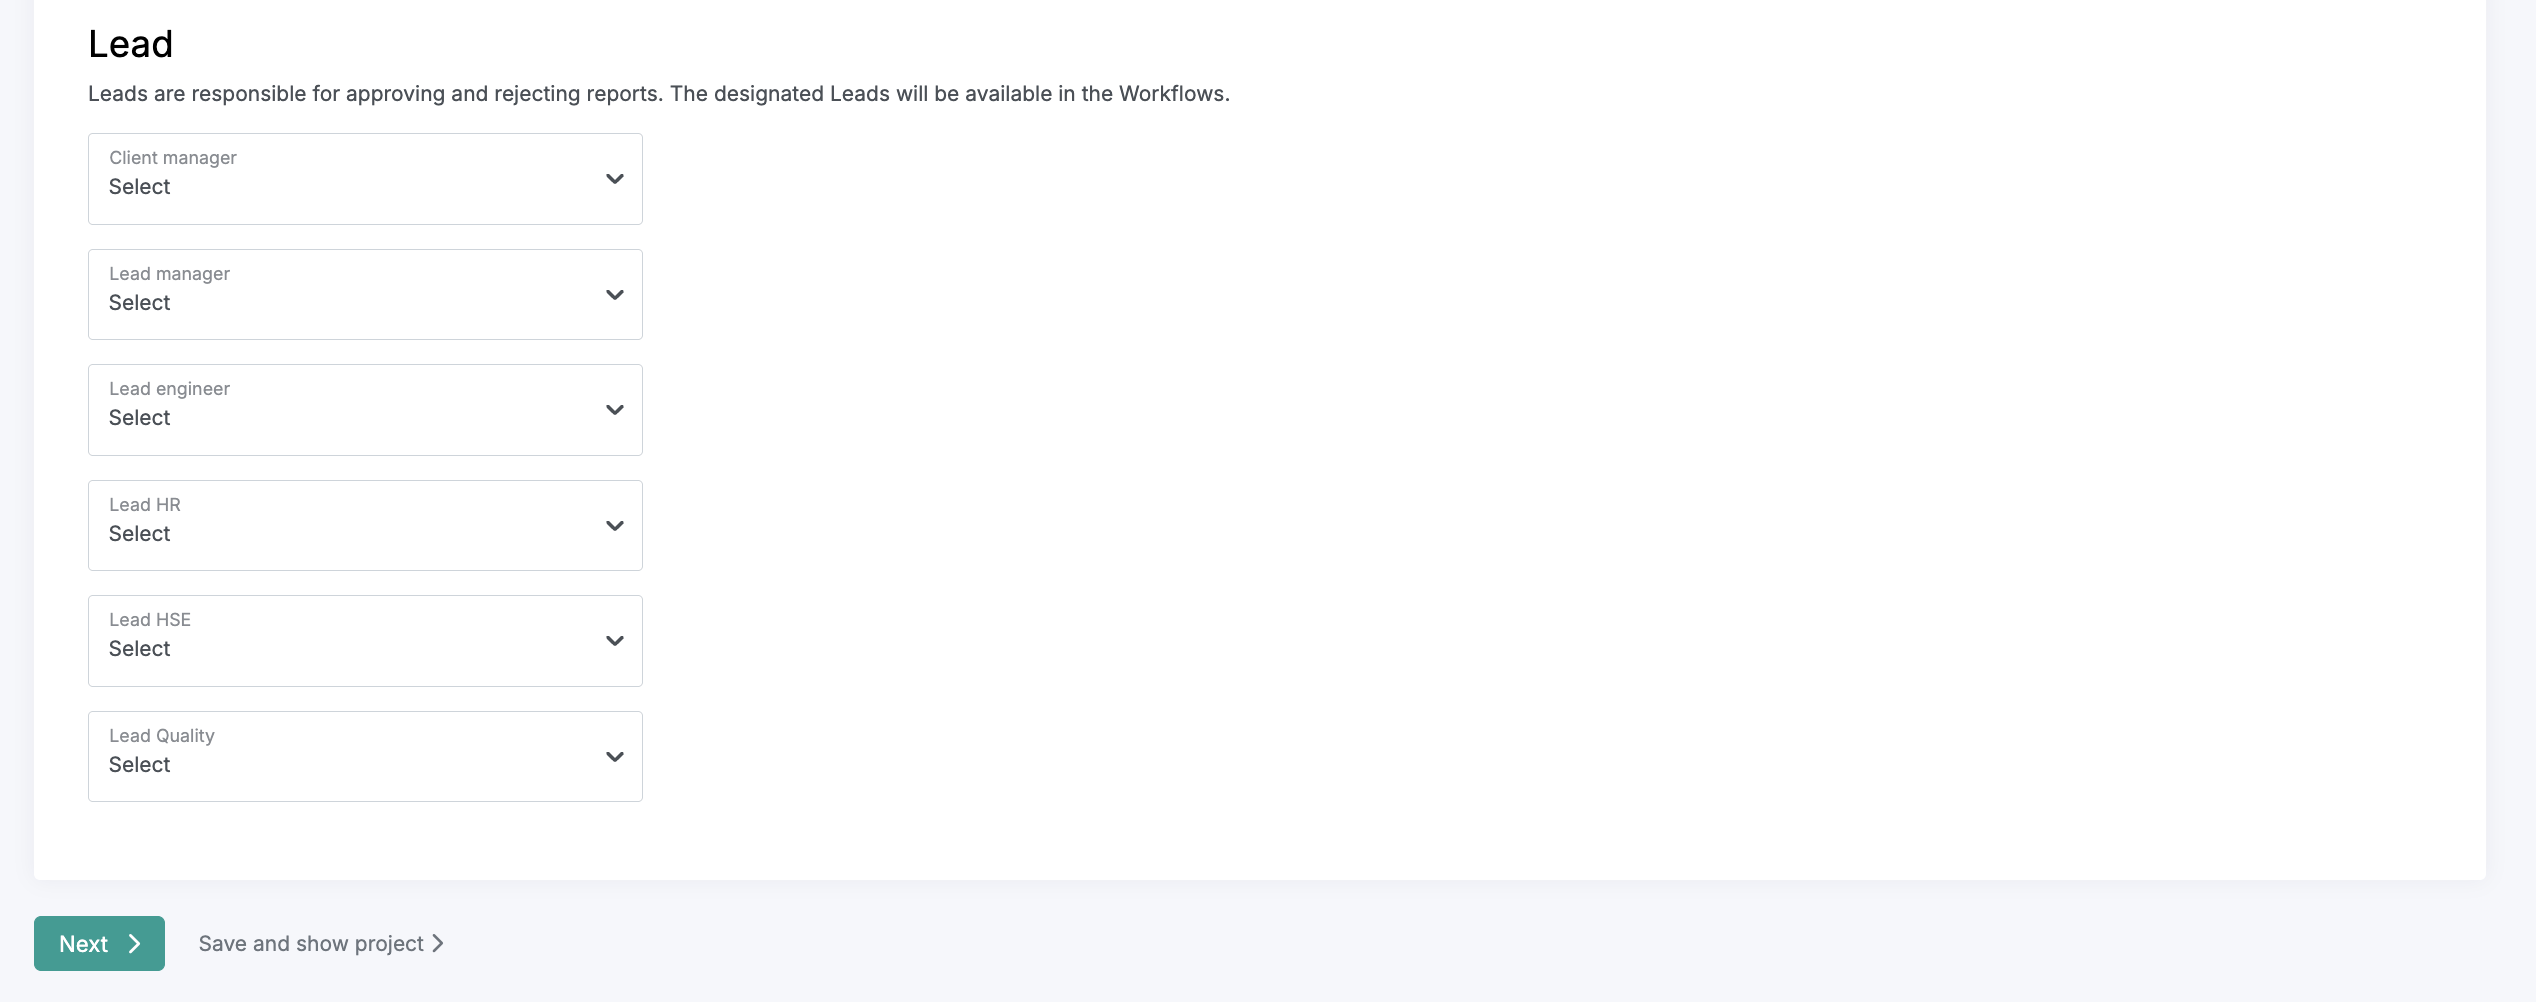
Adding Project Lead Positions
Project Lead positions define the main point-persons responsible for each area of the project. These roles make it easy to manage ownership and perform bulk updates within workflows.
Assign a Project Lead to each relevant area.
It’s completely acceptable for one individual to hold multiple lead roles across different areas if needed.
When the section is complete, click Next to continue to the following setup screen.
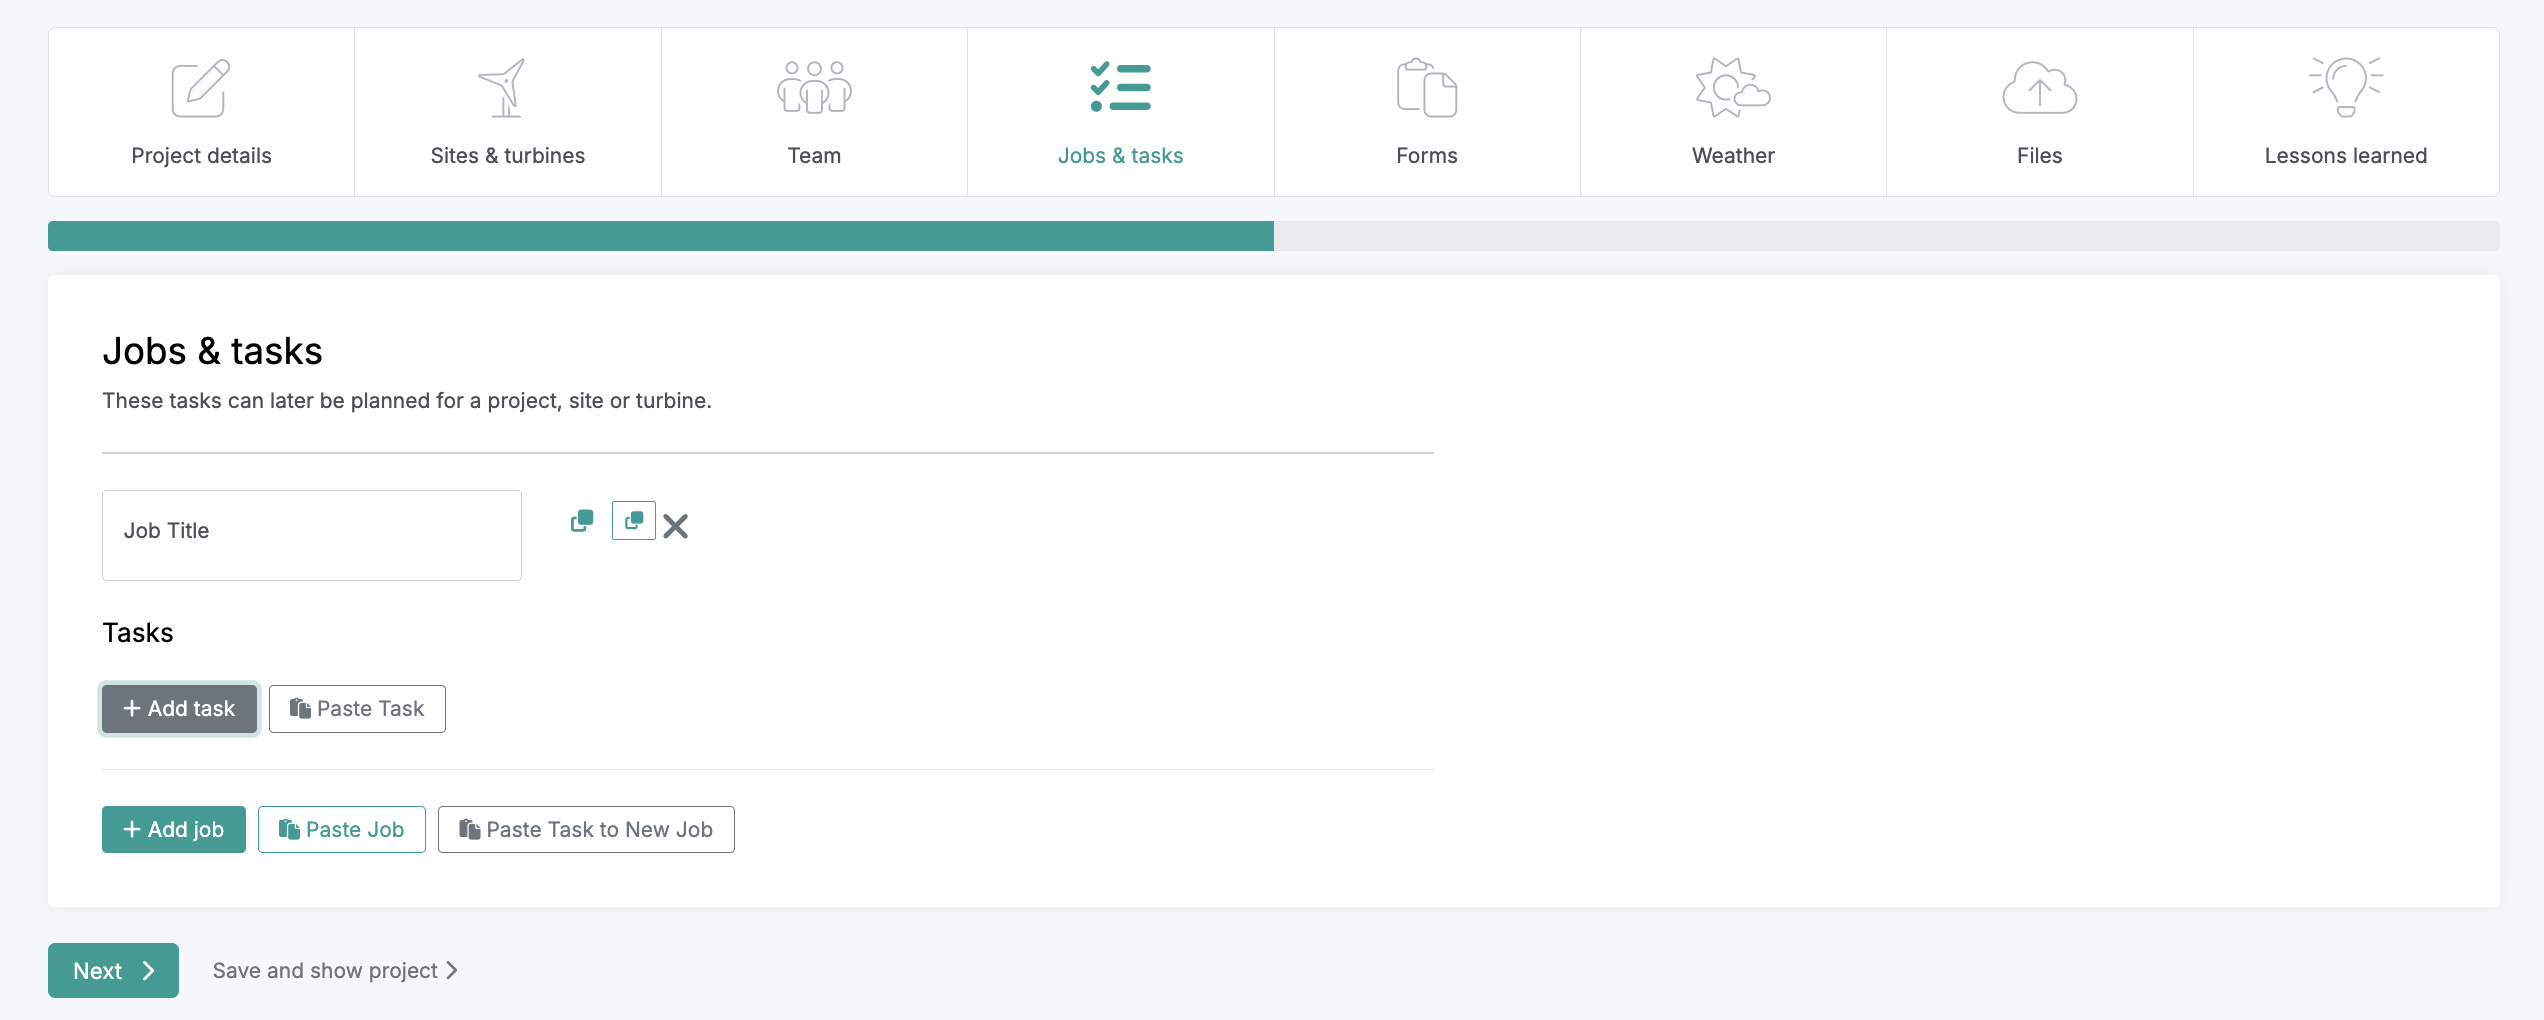
How to Create Jobs in the Project Wizard
Jobs define the high level scopes of work within a project, while Task Stages represent the major checkpoints needed to complete each job. These Jobs become available for scheduling and tracking in the Project Planner.
Technicians record time against each task in their timesheets, and the system automatically updates job progress as a percentage in your environment.
To create Jobs:
Enter a Job Title.
Add at least one Task Stage under the job.
Think of a Job as the full scope of work, and Tasks as the segments or milestones that complete that scope.
Examples:
Job: EoW Blade Repair
Tasks: Blade A, Blade B, Blade C
Job: Pre-Assembly Inspections
Tasks: Hub Inspection, Nacelle Inspection, M1 Tower Inspection
Job: BoP
Tasks: Above Water, Below Water
Note: Locations of each job and task are tracked automatically.
Once your Jobs and Task Stages are set, click Next to continue building your project.
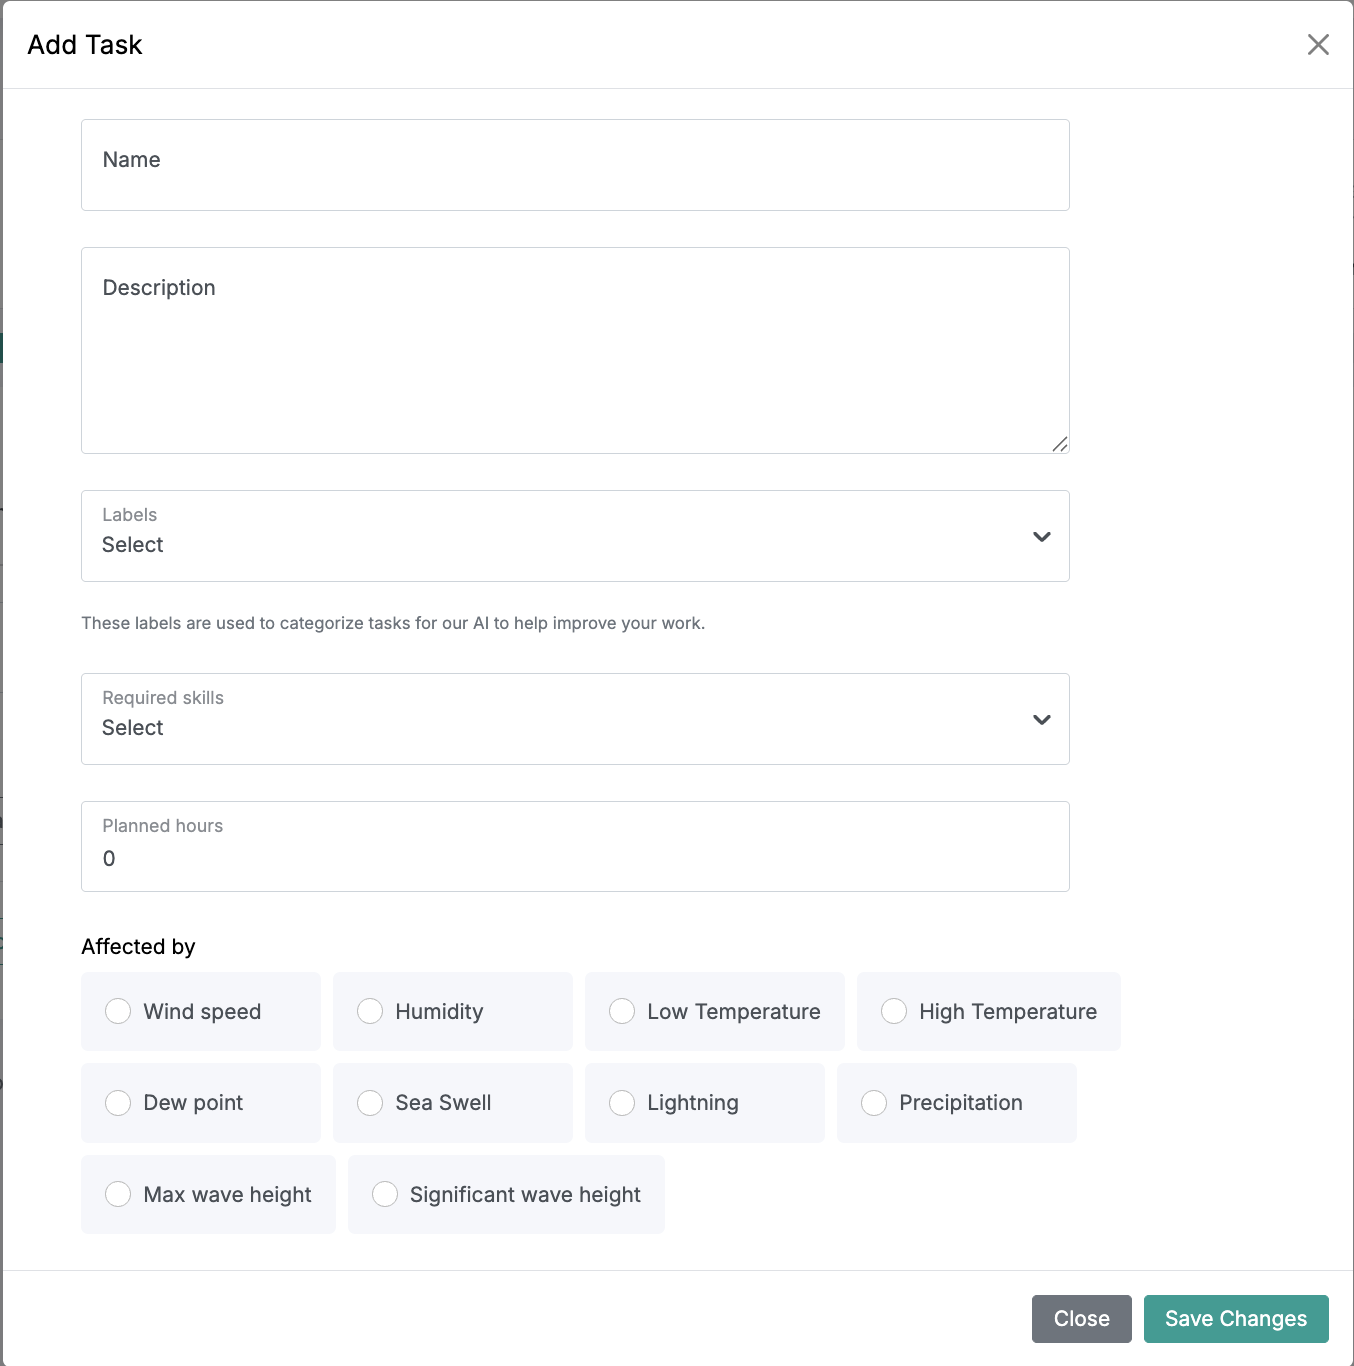
How to Fill in the Add Task Screen
The Add Task screen defines the key details of tasks which helps establish accurate planning metrics across your project.
Follow these steps to complete the section:
Add Task Name and Description: Enter a clear task name and description. These fields are visible to technicians in their mobile schedule, helping them understand scope and context.
Assign Required Skills: If the task requires specific training or qualifications, add them via the Required Skills dropdown. This list connects directly to your central Skills menu.
Enter Planned Hours: Estimate the total duration needed for the task, including logistics, standby, or travel time.
Example: The task activity takes 6 hours, but factoring in breaks and transfer time, the total estimated work time is 12 hours.
Planned hours are aggregated across all tasks at a location to provide precise Planned vs Actual comparisons once work begins.
Specify Weather Dependencies: In the Affected By section, select relevant weather types that could delay or restrict planning. This ensures planners are alerted to potential impacts.
When the section is complete, click Next to proceed to the next setup step.
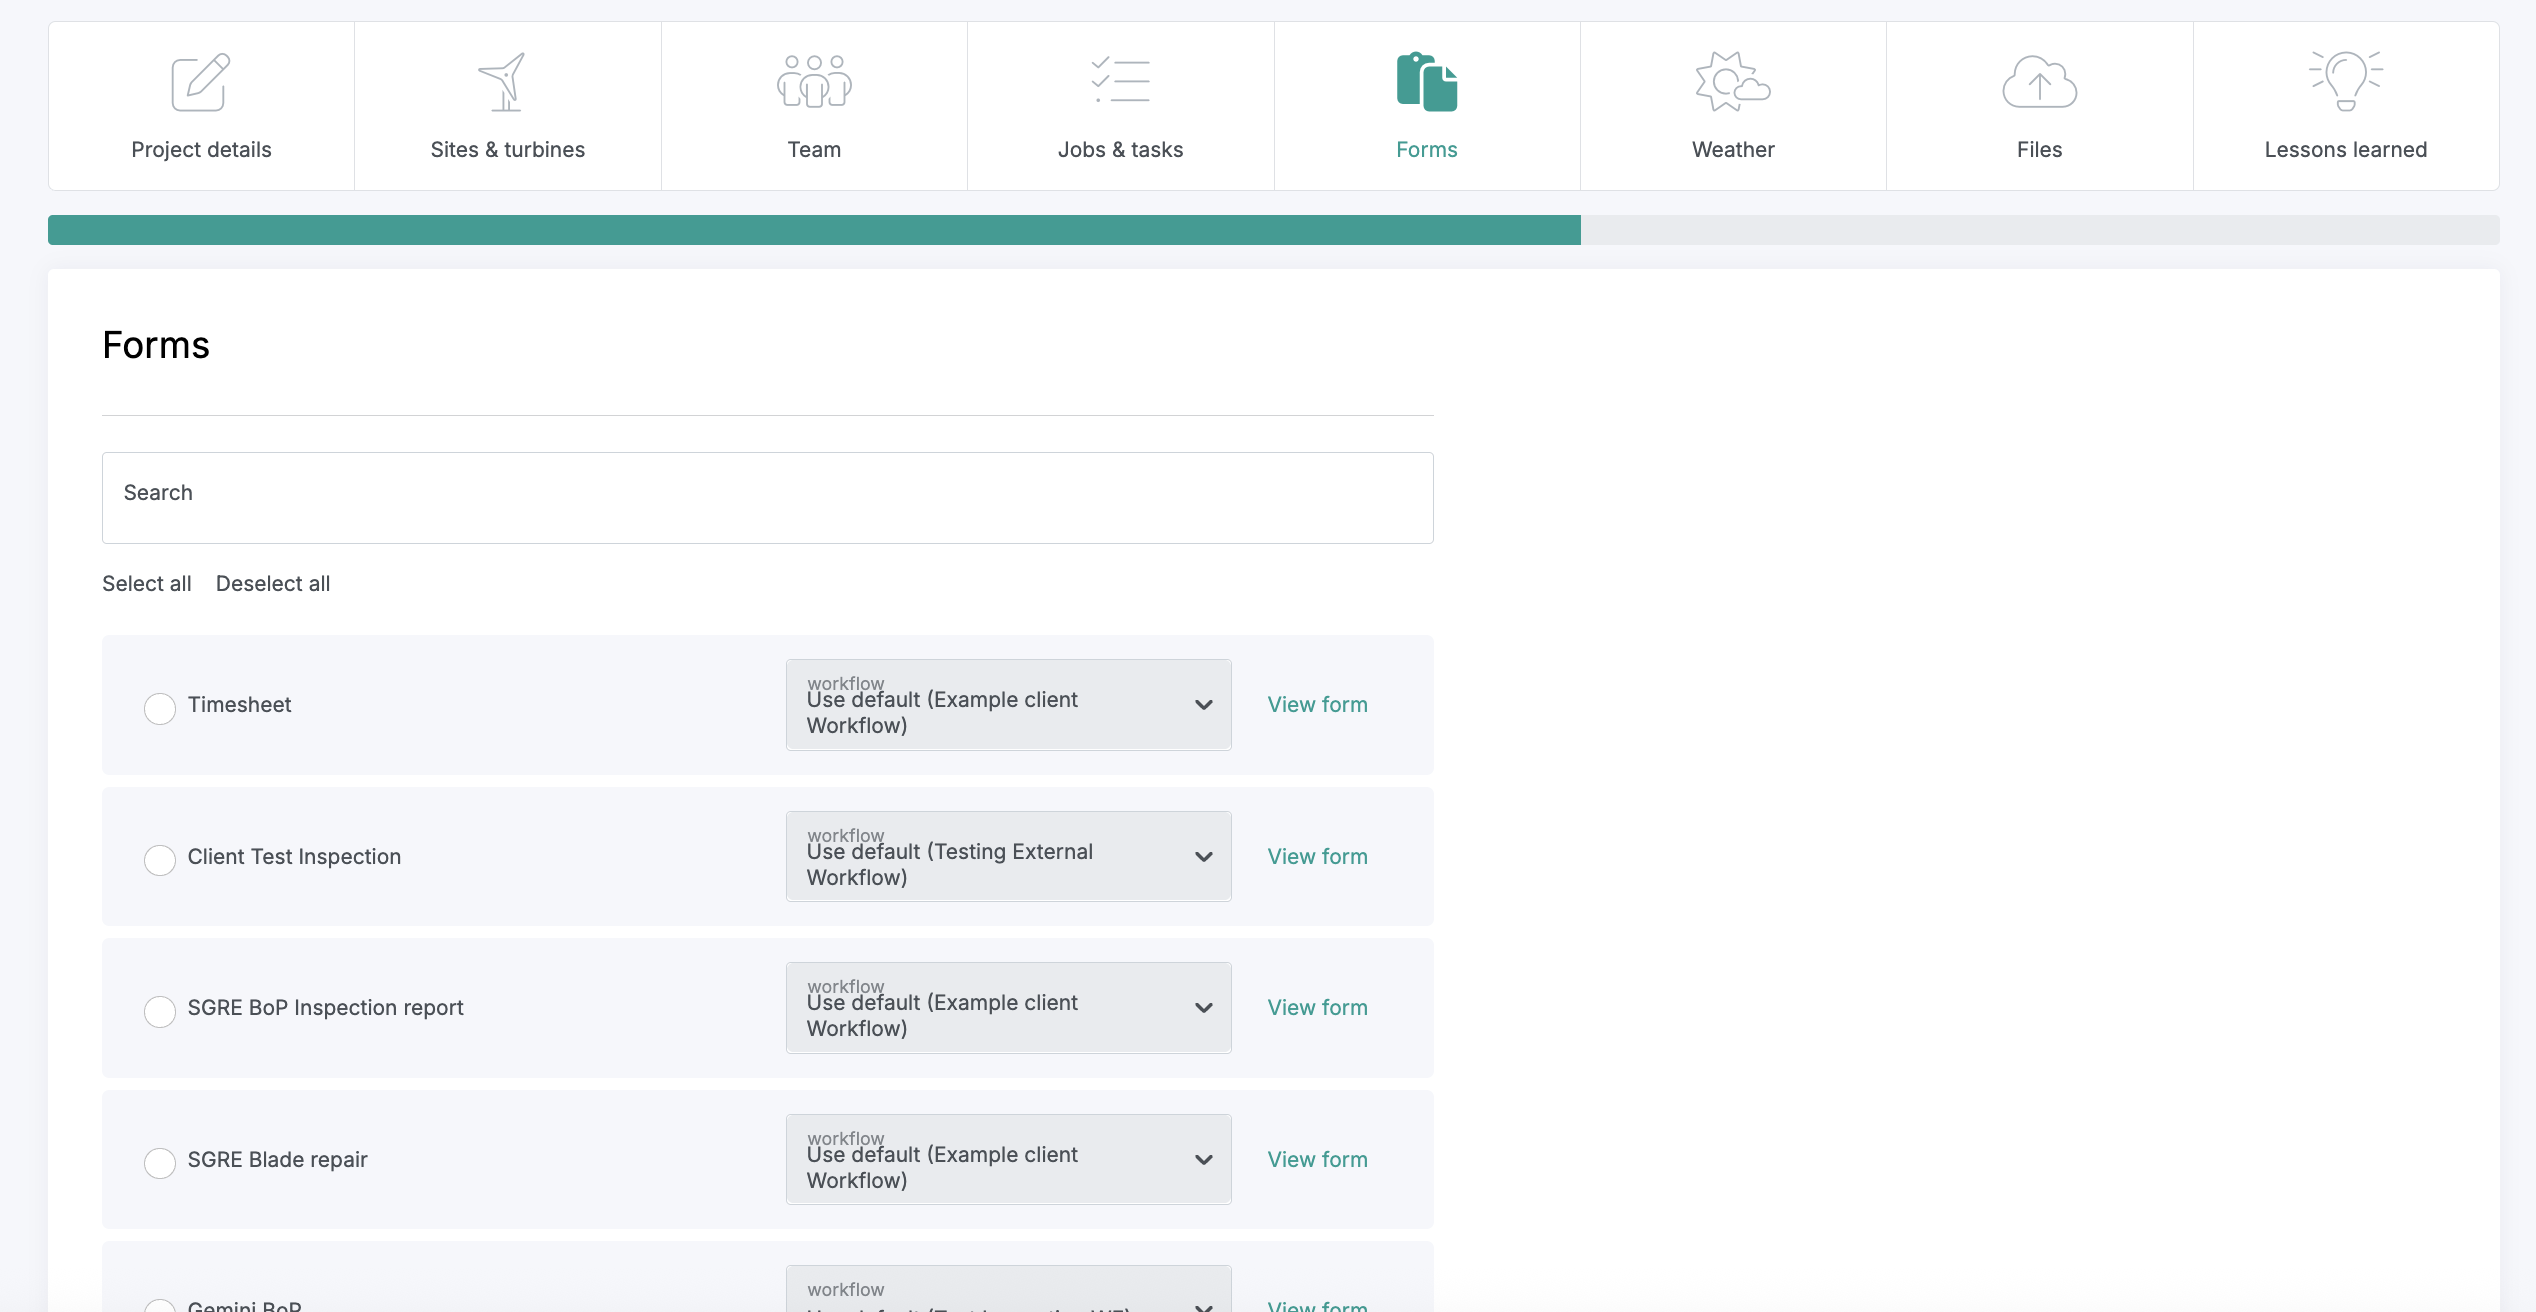
How to Fill in the Forms Screen
The Forms screen lets you assign the forms and workflows technicians will use to submit project data in the field.
Follow these steps to complete the section:
Add Required Forms: Search for form names and tap the Select circle beside each form to include it in the project. Tap again to deselect if needed.
Update Workflows:
Use the Workflow dropdown to change the default workflow connected to each form.
If you need a new workflow, you can create one anytime in the main Workflow menu.
Adding the correct forms at this stage ensures your technicians have the right reporting tools available automatically on mobile.
When all forms and workflows are set, click Next to continue to the next step of the Project Wizard.
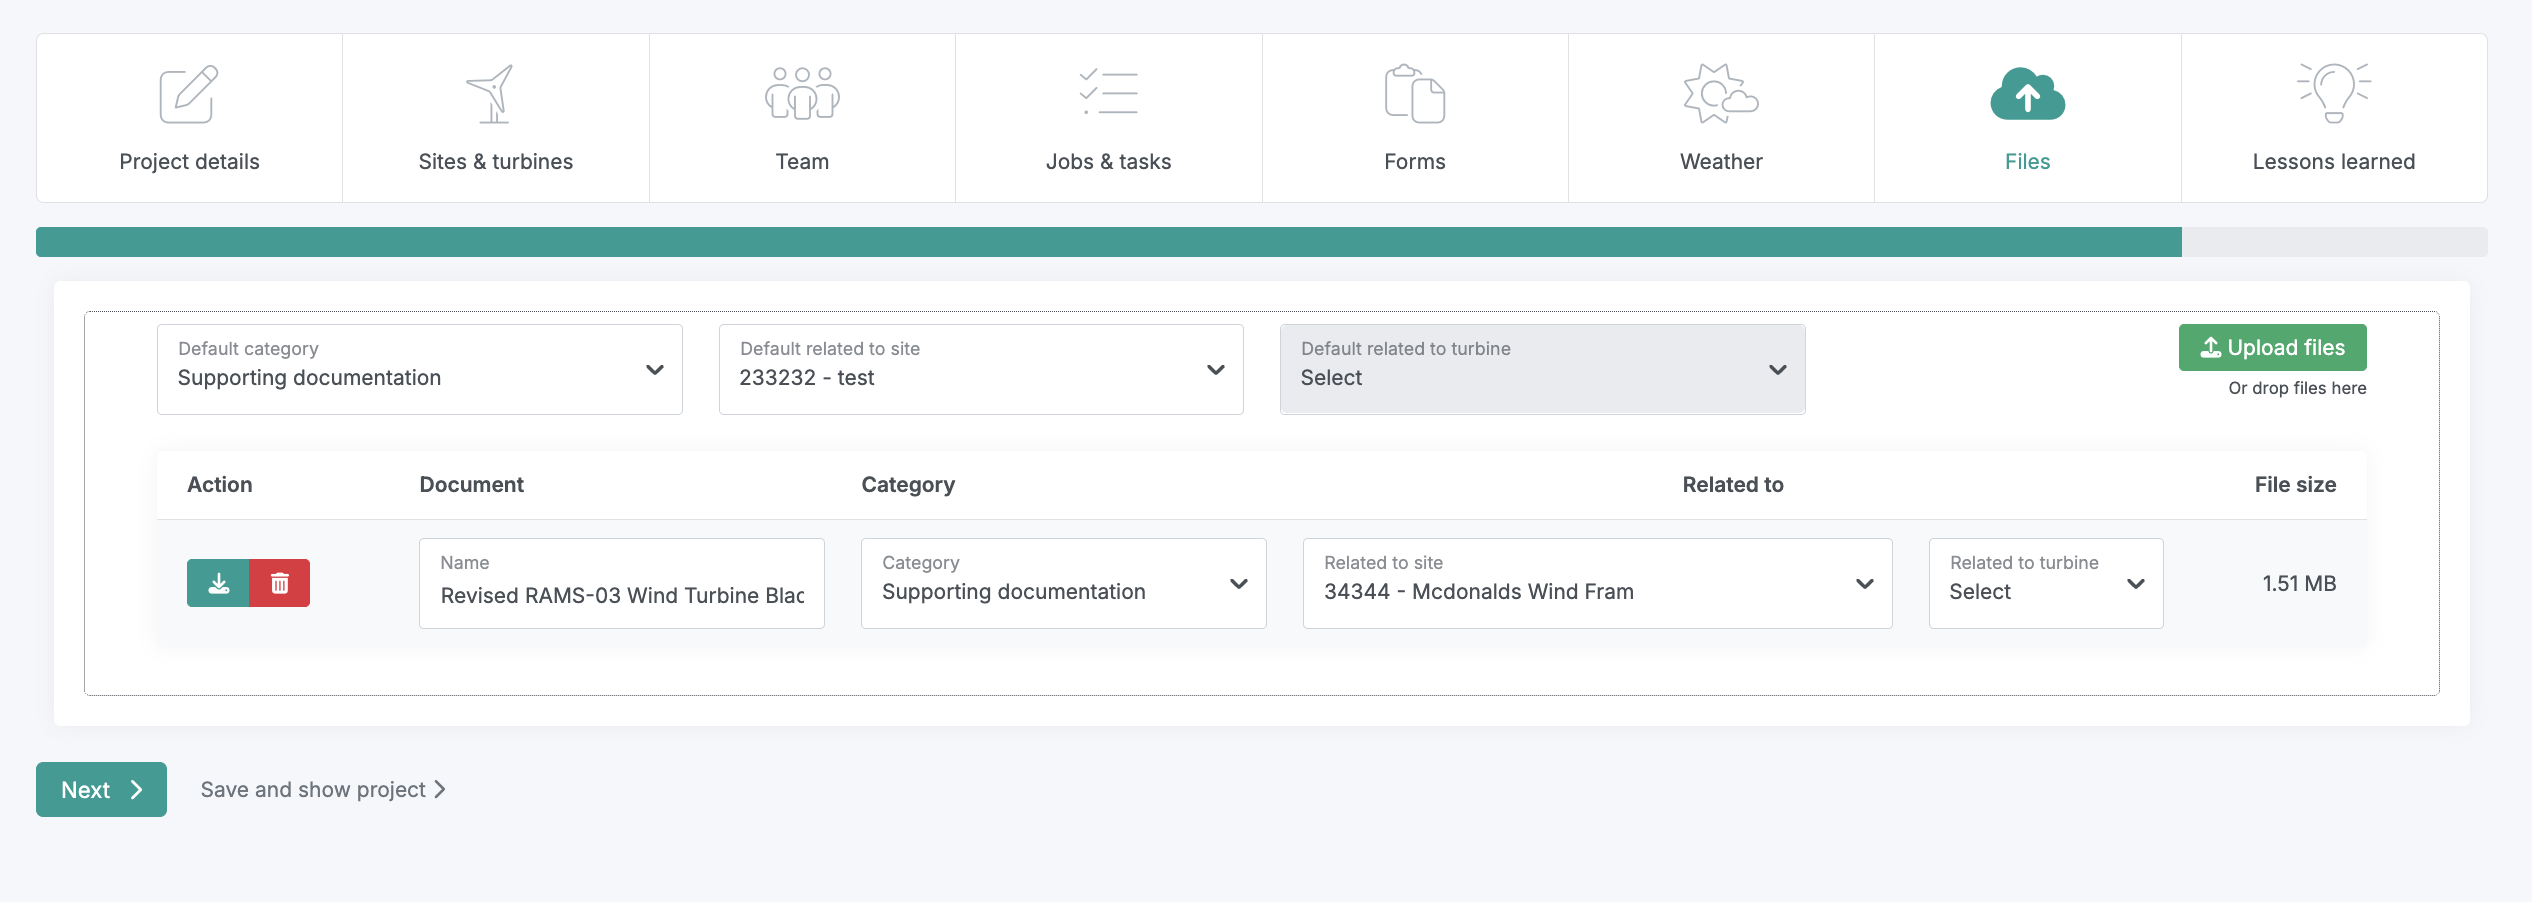
How to Fill in the Files Screen
The Files screen allows you to upload and organize project documentation. These files are also accessible to technicians through the Technician Copilot, enabling them to interact with embedded documentation even when offline.
Follow these steps to complete the section:
Upload Files:
Drag and drop files directly onto the Upload Files button, or click the button to browse and upload from your computer.
You can upload multiple files at once. Note that larger uploads may take longer as files are processed in a queue.
Assign Document Scope:
By default, uploaded files are assigned project-wide.
To link a document to a specific site, open the Default Related to Site dropdown and select the desired site.
For projects with multiple sites, use the Related to Site dropdown to specify the correct one.
To link documents to specific assets, use the Related to Turbine dropdown to target a turbine at site level.
These contextual assignments help ensure technicians access the right files for their specific site or asset while maintaining organized data structures.
When the section is complete, click Next to move to the following setup screen.
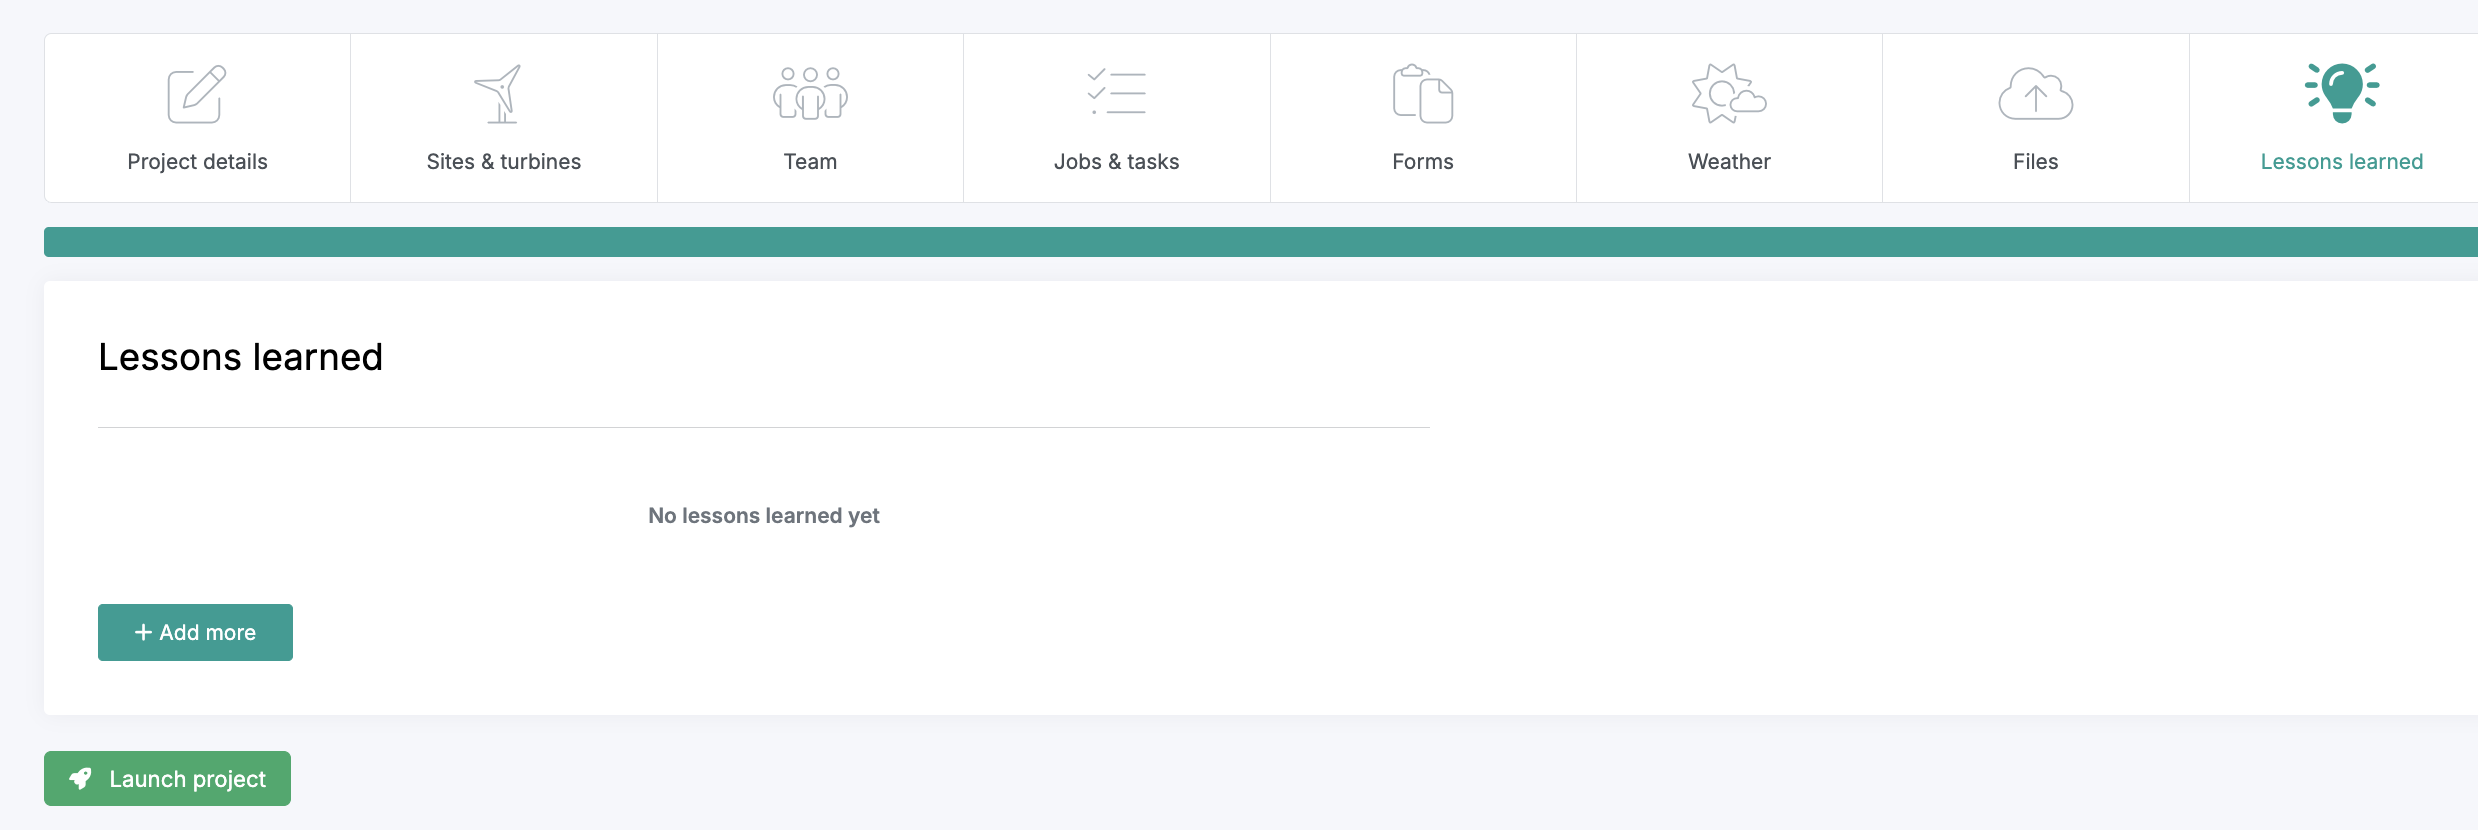
How to Add Lessons Learned
The Lessons Learned section allows you to document key insights, best practices, and avoidable mistakes from current or past projects. These notes are automatically shared with technicians through the Twindo Mobile App, helping teams learn and improve continuously in the field.
Follow these steps to complete the section:
Select Add More and enter your lessons learned.
Keep this section updated throughout the project duration. It can only be edited within the Project Wizard.
When your entries are complete, click Launch Project to finalize setup.
Congratulations—you’ve just created a fully structured and intelligent project environment!
The small effort invested up front provides lasting value across planning, reporting, and technician efficiency.
Frequently Asked Questions
“I added technician names in the project setup (Project Wizard), but they can’t see the project on mobile.”
Technicians must be added through the Project Planner to be assigned to projects and connected with related project data. Adding their names during setup defines positions only, it does not yet link them to the live project environment.
“I want to reuse the teams and jobs from this project in another project.”
No problem. In the Project Planner, select the current project to display its available jobs and teams.
From the Available Jobs panel on the right-hand side, drag and drop the desired job or team into any planner board row in the new project.
“I want to change a workflow for one report within a project.”
You can!
Create a new workflow in the Workflow menu.
Open the Forms section in the Project Wizard.
Locate the specific report and assign the new workflow to it.